Friday, 31 March 2017

Salesforce Deployment Tools

Various Deployment Tools available in salesforce

The Force.com Migration Tool is a command-line tool and migrates data between two environments, including Developer Editions orgs. Using Force.com migration tool, we can move data between two sandboxes and between sandbox and production.

The Force.com Migration Tool is a Java/Ant-based command-line utility for moving metadata between a local directory and a Salesforce org. Use the Force.com Migration Tool to perform repetitive deployments that can be scripted and that use the same components (the same package.xml file). 

It uses project manifies calls package.xml. The manifest is an XML file that defines the components you’re migrating and specifies the version of the Metadata API to use.

Deleting Files from an Organization

destructiveChanges.xml. file 
<?xml version="1.0" encoding="UTF-8"?>
<Package xmlns="http://soap.sforce.com/2006/04/metadata">
<types>
<members>MyCustomObject__c</members>
<name>CustomObject</name>
</types>
</Package>

To deploy the destructive changes, you must also have a package.xml file that lists no components to deploy, includes the API version, and is in the same directory as destructiveChanges.xml:
package.xml file

To retrieve all members of a type, you use the wildcard (*) character instead.


<?xml version="1.0" encoding="UTF-8"?>
<Package xmlns="http://soap.sforce.com/2006/04/metadata">
    <types>
        <members>*</members>
        <name>CustomObject</name>
    </types>
    <version>39.0</version>
</Package>

Adding and Deleting Components in a Single Deployment

The only difference is that package.xml contains components which need to be added/updated.
By default, deletions are processed before component additions. In API version 33.0 and later, you can specify components to be deleted before and after component additions. The process is the same as with performing a delete-only deployment except that the name of the deletion manifest file is different.
  • To delete components before adding or updating other components, create a manifest file that’s named destructiveChangesPre.xml and include the components to delete.
  • To delete components after adding or updating other components, create a manifest file that’s named destructiveChangesPost.xml and include the components to delete.
<Package xmlns="http://soap.sforce.com/2006/04/metadata">
<types>
<members>SampleClass</members>
<name>ApexClass</name>
</types>
<version>39.0</version>
</Package>
<Package xmlns="http://soap.sforce.com/2006/04/metadata">
<members>MyCustomObject__c</members>
<name>CustomObject</name>
</types>
</Package>


 Deployment Tools

Change Sets and the Force.com Migration Tool are the recommended tools for migration. Change Sets is accessible through the Salesforce user interface and allows migrations between sandbox and production. T


The main use case of packages is for ISV developers to distribute apps to subscribers. But they can be used also for moving changes between Developer Edition orgs.


Delete Components


To delete components, create a delete manifest that’s destructiveChanges.xml. The format of the delete manifest is the same as package.xml, except that wildcards aren’t supported.


Specify components which needs to be deleted in destructiveChanges.xml and components to be added/updated in package.xml. This process is similar as process which only deletes components.


The ability to specify when deletions are processed is useful when you’re deleting components with dependencies. For example, if a custom object is referenced in an Apex class, you can’t delete it unless you modify the Apex class first to remove the dependency on the custom object. In this example, you can perform a single deployment that updates the Apex class to clear the dependency and then deletes the custom object by using destructiveChangesPost.xml. The following are samples of the package.xml and destructiveChangesPost.xml manifests that would be used in this example.
Package.xml file which contains class which needs to update
<?xml version="1.0" encoding="UTF-8"?>
<Package xmlns="http://soap.sforce.com/2006/04/metadata">
    <types>
        <members>SampleClass</members>
        <name>ApexClass</name>
    </types>
    <version>39.0</version>
</Package>

destructiveChangesPost.xml, which specifies the custom object to delete after the class update:
<?xml version="1.0" encoding="UTF-8"?>
<Package xmlns="http://soap.sforce.com/2006/04/metadata">
    <types>
        <members>MyCustomObject__c</members>
        <name>CustomObject</name>
    </types>
</Package>
Limit of deployment file size
  • If using the Force.com Migration Tool to deploy an unzipped folder, all files in the folder are compressed first. The maximum size of uncompressed components in an unzipped folder is 400 MB or less depending on the compression ratio. If the files have a high compression ratio, you can migrate a total of approximately 400 MB because the compressed size would be under 39 MB. However, if the components can't be compressed much, like binary static resources, you can migrate less than 400 MB.

Different Types of Packages 


Monday, 27 March 2017

Salesforce Apps which you shouldn't miss

Adobe Sign: (e-sign, e-signature, electronic signature, EchoSign)


Adobe Sign enables you to send, sign, track and file contracts quickly and securely right in Salesforce. Works on Salesforce1 mobile and in Sales Cloud, Community Cloud, Service Cloud, App Cloud and more.

Improve data accuracy, reduce errors and improve ability to audit contracts and agreements through merge mapping and data mapping, with no coding required. Automation of the contract process improves compliance and reduces risky manual processes.


Apttus CPQ helps you handle your quoting process right in Salesforce from any device. Manage configuration, pricing, quoting, discounts, incentives, and proposals. Apttus CPQ handles simple to highly complex product & pricing configurations across all sales channels.

Conga Composer

Customize, streamline and scale your document generation and reporting, removing administrative roadblocks. Create & deliver documents, presentations & reports in Word, PowerPoint, Excel, HTML email & PDF from any standard/custom object.

Distribution Engine

Distribution Engine is a rules-based engine that ensures your leads and opportunities are evenly distributed to team members.
The Distribution Engine is a powerful and easily configurable rules based engine that ensures your Leads, Opportunities (or any standard or custom objects) are distributed to team members in an intelligent and timely manner. Increase fairness and productivity.

DocuSign Electronic Signatures 

Sign and send documents anytime, anywhere, on any device. DocuSign makes any workflow or approval simple, secure and fully digital, so you can get on with your business, and your life. 

Drawloop Document Generation

Button-click document creation and business process automation.

  • Accelerate Sales and Service
  • Button-click sales quotes, order forms, proposals, invoices, contracts, reports, account plans, business/pipeline reviews, forecasts, and account summaries. Simplify contract management with the Component Library.
  • Document generation processes can be activated with the click of a button, by batch, or workflow - users never leave the familiarity of Salesforce.
  • Admins control all business logic from a single document template and users don't manage a thing. Easy install and configuration with the NEW Setup Wizard. Includes a sample template library to get you up and running FAST.

  • Seamless User Experience: 
  • Easy Admin Configuration: 

Velocify Pulse


For B2B sales teams that are ready to grow revenue faster, Velocify Pulse™ has perfected sales dialing and emailing by enabling an unprecedented level of focus on executing your sales team’s optimal sales process.
  • Increase conversion rate by 128% with the Velocify Pulse feature-complete inbound and outbound dialer with Click-to-Dial, Power Dialing, Local Presence, Pre-recorded voicemails, advanced call transfer features, and email triggers
  • Take the guesswork out of selling and increase conversion rate by 97% with automatic prioritization of accounts, contacts, leads, and opportunities
  • Motivate sales reps and increase conversion rate by 53% by rewarding reps with what they really want, more and better leads

Sunday, 19 March 2017

Spring 17 - Sales Cloud Features


Global Actions Added for Contracts and Orders


Global actions are available for the Contract and Order objects, so you have more control over customizing actions for these objects.

Quick Actions are added in the Salesforce Classic Publisher section to the page layout editor for Contracts and Orders and made global actions available there.


Rich-Text Editor for Notes Is Now Using Quill


Rich text editor used in notepad is replaced with Quill editor. It has same functionality as Rich text editor but slightly different visual appearance. This change applies to Lightning Experience, Salesforce Classic, and all versions of the Salesforce1 mobile app.

Business Processes Use Name Field to Evaluate Person Accounts
Previously, an account-related process that used the Name field looked only at business accounts, even when the person account’s first and last names matched the rule criteria. Now, a process that uses the Name field looks at person accounts.
If you prefer processes continue to ignore person accounts, add the IsPersonAccount field to the criteria so that person accounts are excluded.
Triggers, validation rules, flows, approvals, workflow, and Process Builder evaluate person accounts more effectively.

Account Autofill Now Called Automated Account Fields

Automated Account Fields is the new name for the account feature that displays US-based companies in the Account Name field as sales reps enter information. Reps can select a suggested company from the list, making it easier to create business accounts.This change applies to Lightning Experience only.

Sales Console Permissions Are Easier to Assign in Salesforce Classic

A standard permission set is now available for the Sales Console in Salesforce Classic. Standard permission sets save you time when working with permission set licenses. When you purchase the Sales Console permission set license, you can immediately assign the permission set to users.

Lead Assignment Rules Visible in Lightning Experience

Salespeople can now see the Lead Assignment checkbox on new leads in Lightning Experience. This change applies to Lightning Experience only.

Fields Changed in Quotes Related Lists

In Winter ’17 and earlier, the quotes related list on opportunities, contacts, and contracts included Discount and Grand Total fields.

In Spring ’17, we removed those fields and added Subtotal and Total Price fields. The Discount and Grand Total fields still appear on the quote line item record home.

Subtotal is the line item’s sales price multiplied by the quantity and minus the discount.

Total Price is the total of the quote line items after discounts and before taxes and shipping.

Discount is the difference between the sum of the QuoteLineItem record’s Subtotal and the sum of the QuoteLineItem record’s Discount totals. Expressed as a percentage.

Grand Total is the total price of the quote plus shipping and taxes.

Refer Release Notes here


Salesforce Optimizer - Improve Your Salesforce Implementation

Optimizer is a powerful tool that provides recommendations for how to improve some features in your Salesforce implementation. However, Optimizer only analyzes a subset of features across Salesforce.
Salesforce Optimizer evaluates the following features:
  • Fields
  • Apex triggers
  • Page layouts
  • Report types
  • Validation rules
  • Sharing rules
  • Administrator permissions

After analysis is complete, Salesforce email you a personalized Optimizer report with advice and recommendations about how to improve your implementation.

To launch Optimizer follow following steps:-
Setup-> Monitor -> Optimizer
You can run Optimizer for both sandbox and production environments. Note if you run this in a sandbox you must change Setup > Email Administration > Deliverability > Access level to “All email” or the email with your report will never be delivered to you.


Friday, 10 March 2017

Start learn to code- Apex , Visual force


Standard Controller Example

Write Visualforce page to create new Account

<apex:page standardController="Account">
<Apex:form >
<Apex:pageblock title="Create new account">
<Apex:pageBlockButtons >
<Apex:commandButton value="save" action="{!save}"/>
</Apex:pageBlockButtons>

<apex:pageBlockSection title="Enter Account details" columns="2" >

<apex:inputField value="{!account.name}"/>
<Apex:inputField value="{!account.type}"/>
<apex:inputField value="{!account.AccountNumber}"/>
</apex:pageBlockSection>
</Apex:pageblock>
</apex:form>
</apex:page>
                                        

Write visualforce page to create new contact using standard controller


<apex:page standardController="Contact">
<apex:form >
<apex:pageblock title="Enter contact Details">
<Apex:pageblocksection >
<apex:inputField value="{!contact.firstname}"/>
<apex:inputField value="{!contact.lastname}"/>
<apex:inputField value="{!contact.AssistantName}"/>
<apex:inputField value="{!contact.AssistantPhone}"/>
<apex:inputField value="{!contact.Department}"/>
<apex:inputField value="{!contact.email}"/>
<apex:inputField value="{!contact.Accountid}"/>
</Apex:pageblocksection>

<Apex:pageBlockButtons location="bottom">

<apex:commandButton value="Save" action="{!Save}"/>

</Apex:pageBlockButtons>
</apex:pageblock>
</apex:form>
</apex:page>
 

Display Account details of specific Account


Create visualforce page as follows and saved as Accountliststandard.


<apex:page standardController="Account">
 <apeX:pageBlock title="Account Details">
  <apex:pageBlockSection >
  
  <apex:outputField value="{!Account.name}"/>
  <Apex:outputField value="{!account.AccountNumber}"/>
  <Apex:outputField value="{!account.AnnualRevenue}"/>
  <Apex:outputField value="{!account.billingstreet}"/>
  <Apex:outputField value="{!account.billingcity}"/>
  <Apex:outputField value="{!account.billingcountry}"/>
  <Apex:outputField value="{!account.Industry}"/>
  
  </apex:pageBlockSection>
  </apeX:pageBlock>
</apex:page>

Click on preview button and pass account id.

https://c.ap2.visual.force.com/apex/Accountliststandard?id=0012800001AikIt

Get/Set Method salesforce

Get

The "get" method is used to pass data from your Apex code to your Visualforce page.. In our example we are not passing any value.. hence, when your page loads initially the textbox will have a empty value..

Apex Controller

Public class get_set_method
{

public string usrinput{get;set;}

public void getmethod()
{
usrinput='hello';
}
}

Visualforce page

<apex:page controller="get_set_method">
  <apex:form >

  <apex:pageblock >
  <apex:pageBlockSection >
  <apex:outputText value="Check Value"/>
  <apex:inputtext value="{!usrinput}"/>
  </apex:pageBlockSection>
  </apex:pageblock>

  </apex:form>

</apex:page>

When you save the page then you will get empty value.

output

Check Value        

We can pass value from apex code to visualforce page. In below example in constructor, we have set usrinput value  as 'I am fine!'. When visualforce page will load then it will show this value.

Apex Controller

Public class get_set_method
{

public string usrinput{get;set;}

public get_set_method()
{
usrinput='I am fine!';

}
public void getmethod()
{
usrinput='hello';
}
}


Set 

Set method is used to pass value from visualforce page to apex class.

Apex controller

Public class get_set_method
{

public string usrinput;

public string getusrinput(){
return 'hello';
}

public void setusrinput (string usrinput)
{
usrinput=this.usrinput;

}
}

Visualforce page

<apex:page controller="get_set_method">
  <apex:form>
    <apex:outputlabel value="Enter your name here"/>
       <apex:inputtext value="{!usrinput}">
           <apex:actionsupport event="onclick" rerender="display" />
       </apex:inputtext>                   
    <apex:outputpanel id="display">
        <apex:outputtext value="The name entered is {!usrinput}"/>
    </apex:outputpanel>   
    
            <apex:actionStatus id="counterStatus" 
                           startText=" (incrementing...)" 
                           stopText=" (done)"/>

                                           
  </apex:form>    

</apex:page>


Communicate Between Visualforce page and Apex


In this example, we will pass value from visualforce page to apex.

Public class get_set_method
{

public string usrinput{get;set;}
public string usroutput{get;set;}

public void Display()
{
usroutput=usrinput;
}
}

Visualforce page

<apex:page controller="get_set_method">
  <apex:form >
 
   <apex:pageBlock title="Input section">
<Apex:outputLabel value="input Value is:"/>
   <Apex:inputtext value="{!usrinput}" />

<apex:commandButton action="{!display}" value="Click me" reRender="panel"/>

</apex:pageBlock>

<apex:pageblock title="Output section">
<apex:outputPanel id="panel">
<Apex:outputLabel value="Output Value is:"/>
   <apex:outputText value="{!usroutput}"  />
   </apex:outputPanel>
</apex:pageblock>
                                         
  </apex:form>  
</apex:page>

Example to show sum of two userinput fields using visualforce page


<apex:page controller="sum">
<apex:form >
<Apex:pageblock title="Add Two Numbers">
<apex:pageBlockSection >
<Apex:outputLabel value="First Value"/>
<apex:inputtext value="{!a}"/>
<Apex:outputLabel value="second value"/>
<Apex:inputtext value="{!b}"/>
</apex:pageBlockSection>
<apex:pageBlockSection >
<Apex:outputLabel value="Sum is"/>
<aPEX:OUTputText value="{!c}"/>
<apex:commandbutton value="Show" action="{!display}"/>
</apex:pageBlockSection>
</apex:pageblock>
</apex:form>
</apex:page>

Difference in ‘Rendered’, ‘Render As’, ‘ReRender’ 


RenderAs
By using renderAs we can generate visualforce page output in pdf.

<apex:page standardController="Account" showheader="false" standardStylesheets="false" extensions="AccountDisplay" renderAs="pdf">

Rendered
Visualforce page component can be hidden or shown on the basis of boolean variable value. It is used to show and hide elements works like css in general we can say display properties

<apex:pageBlock rendered=”{!ShowpageBlock}”>
Account Name  :<apex:outputField value=”{!Account.Name}”/>
Account Number :<apex:outputField value=”{!Account.AccountNumber}”/>
</apex:pageBlock>

Rerender is used when you want to refresh only a portion
reRender= “pgblck1, pgbcl2”

http://fkrt.it/1mOAn!NNNN

Tuesday, 7 March 2017

Chrome Extensions for Salesforce

Salesforce Admin Check All

Salesforce Admin Check All is an extension that enhances the Salesforce Setup
pages by adding "check all" Checkboxes to various checkbox lists.  This enhanced 
functionality helps make some setup tasks more efficient by potentially saving 
administrators from having to manually check each checkbox in a list individually.

On the profile setup page we can see checkbox just below Enable. 
This checkbox will allow to select all Read/edit/delete/View all/delete all 
Options in one go.


Select all fields Checkbox is added on field history tracking page of custom object. 
We can set all field history tracking using this button.

Salesforce Inspector


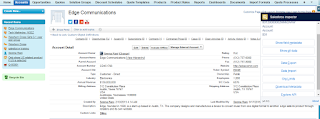
Chrome extension to add a metadata layout on top of the standard Salesforce UI to improve the productivity and joy of Salesforce configuration, development, and integration.

Features

  • Quickly view field information directly from a record detail page, edit page or Visualforce page.
  • Quickly view and edit all data for a record, even data that is not on the page layout.
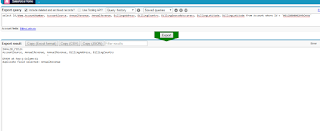
  • Perform quick one-off data exports and imports directly from within Salesforce. Data can be easily copied to and from Excel. No need to log in again when you are already logged in with your browser.

We can view metadata from UI. Click on show field metadata. When you click on field, it will show API name.

We can export all salesforce data using data export option.

View all data using show all data option.


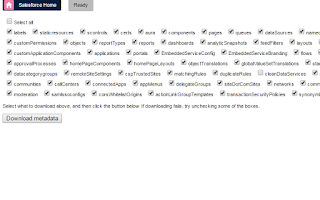
Download metadata


Using this extension you can search your code components your salesforce instance:
1) apex Classes
2) Apex Triggers
3) visualforce Pages
4) Visualforce Components

Features

  1. Advanced Quick Find section:This part gets added in side navigation bar on all set-up pages. Select the code component that you want to go to, then start typing the name of the code,an autocomplete suggestion pops up, select the one that you want to go to.
  2. Developer Utilities: 

  • This component get added in force.com home page only. Let's say you want to know where you have hard-coded a profile name in your code, like if(profile.name =='sys Admin'){//you're doing something}. Right now to find this out you have to either go thru all the code individually or create a force.com project in eclipse and then search there. There's no way we can do this directly in salesforce. This string search will help you do that. You have to check the code components in which you want to search the code, enter a string in the input text field and hit enter. You will be presented with a list of code components where the string is used.

  • Code Coverage Extract: You can View and download the code coverage in your org.


We can search metadata from advance search option given on the left hand side in the setup section.


Boostr for Salesforce


Boost your admin and developer productivity on Salesforce.com with Boostr!


Current features include:
  •  Ability to search when adding items to a change set
  •  Filtering by type when adding to a change set
  •  Showing all items of a given type on one page when adding to a change set
  •  Adding checkbox to table header in admin area to check and uncheck all items in that column
  •  Displaying the API Name next to field names when editing a field set
  •  Using Pascal Case for the API Name when creating new objects and fields
  •  Preventing the placeholder text from filling in the setup area sidebar
  •  Display number of selected fields on field history tracking page
  •  Ability to uncheck all page layouts by default when creating a new field.


When this extension enabled, you will notice below icon in your Google Chrome.